
Solar Panel Snagging Checklist UK (2026)

Handover day is when most solar mistakes quietly become your problem. Before you pay the final invoice, check three things: the paperwork (MCS certificate, electrical certificates, DNO confirmation), the physical install (roof, cabling, labels, battery siting) and proof it performs (monitoring in your name, export readings, first fortnight’s output against the quote). This 48-point solar panel snagging checklist is what I’d run on my own install, plus what to do if the installer pushes back.
Solar Panel Snagging Checklist UK: What to Check Before You Pay the Final Invoice
Updated October 2026
Handover day is the last moment you hold the leverage. After the final invoice clears, you’re a diary entry. Before it clears, you’re the priority. This is the checklist I run: paperwork first, then the roof, then proof it generates what the quote promised.
What is solar panel snagging?
Snagging is the walk-round at handover where you list everything that’s unfinished, damaged or not quite right before you sign the job off. On a solar install a snag can be cosmetic (a scuffed run of trunking) or serious (a missing certificate, a leaking bracket, a battery fitted in the wrong place). The skill is knowing which is which, because that decides whether you hold back the final payment or agree a dated fix list.
Run the checks at three moments: on handover day for the paperwork, roof and electrics; after the first proper rain for leaks; and across your first clear fortnight for performance. The master checklist below is split the same way.
Why the final invoice is your only real leverage
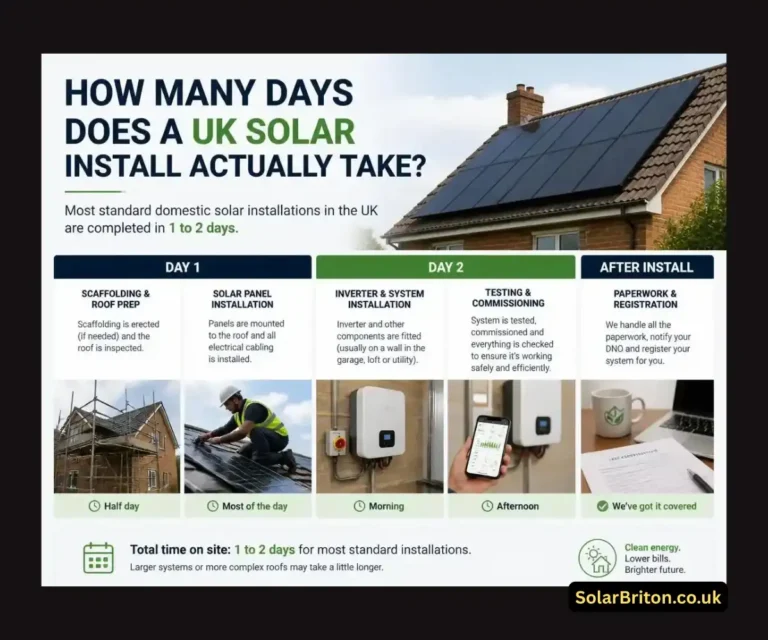
Most domestic jobs take one to two days on the roof, or two to three with a battery on a bigger system, which means the person asking you to sign the completion paperwork is often the same person who was on the ladder that morning. That’s not a criticism. It just means nobody independent has checked the work before money changes hands.
There is a safety net, and it’s worth knowing which one you’re on. Installers have traditionally had to sit under an approved consumer code, RECC or HIES, and those codes run dispute routes. The redeveloped MCS scheme, which every certified installer has to move onto by 31 March 2027, makes consumer code membership optional and makes MCS itself the central complaints route. Either way, a dispute route is compensation after the fact. A withheld final instalment is a fix before the fact. Different animals entirely.
If you haven’t signed the contract yet, ask for a retention clause: a slice of the price held back until the snag list closes. My installer vetting checklist covers what else to ask before signing. If you’ve already signed, don’t panic. Staged payments are normal in this industry, and the timing of the last one is still yours to get right. Pay it when the checks below pass, not when the van reverses off the drive.
The paperwork snag list
Paperwork first, because missing paperwork is the snag that costs money years later, usually at the worst possible moment: selling the house, claiming on a warranty, applying to export. Everything in this table should exist at handover, or have a firm date in writing. Not “in the post next week”. For the MCS certificate, the outer limit is about two weeks (14 days) from commissioning under the current MCS scheme, stretching to 30 days under the redeveloped one.
| Document | Why it matters | What “bad” looks like |
|---|---|---|
| MCS certificate | Proof the install meets MCS standards, and your ticket to SEG payments (a few equivalent schemes, such as Flexi-Orb, are also accepted) | “It’ll come through” with no date; address or system size wrong on it |
| Electrical Installation Certificate, test schedules and PV test results | Legal record that the electrics were tested, not just connected. The PV commissioning tests (IEC 62446) show the array measures up | A one-page certificate with no schedules, or no test readings at all |
| Building Regulations compliance | The installer’s competent person scheme tells your local authority the work is compliant, and the certificate follows from the scheme | Installer assumes you’ll handle it yourself, or can’t name their scheme |
| DNO correspondence | G98 notification confirmation, or G99 approval for larger systems | No idea what a DNO is when you ask |
| Warranty pack | Panel product, panel performance, inverter, battery and workmanship: five separate promises | A single vague “10 year guarantee” scribbled on the quote |
| Manufacturer registrations | Some warranties only start when registered, and some need owner registration | Registered to the installer’s email, not yours |
| Workmanship protection | Cover that survives the installer going bust: an insurance-backed guarantee now, an MCS-approved financial protection product (six years minimum) under the redeveloped scheme | Verbal assurance only |
| Contract & consumer protection paperwork | A contract that matches the quote, plus RECC or HIES documents if your installer is in a code, or the MCS Customer Commitment | Line items that never appeared on the original quote |
| Handover / O&M pack | Datasheets, isolator locations, shutdown steps, maintenance guidance, and a PAS 63100 statement of conformity if you have a battery | A USB stick nobody can find, or nothing at all |
| Final invoice | Itemised, deposit deducted, zero VAT on the solar, battery and diverter | 20% VAT on the install itself, or mystery extras |
The MCS certificate deserves special mention, because it’s the document installers most often treat as optional admin. It isn’t. It’s the difference between an install that counts and an install that’s just hardware on your roof. Here’s what the badge actually commits an installer to, and you can check any installer’s status yourself on the MCS website. If you’re foggy on which of the five warranties does what, this breakdown will stop you accepting a weasel version.
The workmanship protection is the one piece of paper you hope never matters. If the firm folds two years in, it’s the difference between a free fix and a four-figure bill. This is what happens when an installer goes bust, and where the guarantee sits in the wreckage.
An installer who “can’t find” the test schedules is telling you something. The test results are recorded on the day the electrician tests the system, so a missing schedule usually means either the paperwork wasn’t done or the testing wasn’t. Either way, it’s a hold-the-payment item.
Roof, rails and the bits you can see from the lawn
You don’t need to climb up a ladder yourself. Binoculars, a phone on a selfie stick, or the installer’s own scaffold photos from before dismantling will do the job. You’re hunting for a short list of things: tiles lifted or cracked around the mounting hooks, panels sitting crooked or with clamps overlapping the glass, and cable loops dangling off the roof edge instead of running clipped and contained. On slate, cracked slates and leaks round the brackets are the classic snags, and my slate roof guide covers what to look for.
Take panel damage seriously even when it looks cosmetic. A chipped corner or a hairline crack in the glass is a moisture path and a future hot spot, not a scratch. Here’s how to judge whether a cracked panel is safe, covered, and what replacement costs.
Then get your head in the loft on a bright day, torch in hand. Look for pinholes of daylight around penetrations, check the brackets are bolted into rafters rather than battens, and look at the cable entry point where it drops into the house. Come back after the first proper rain and look again, because leaks are shy. They show up days later, in stains, not on handover morning. Roof damage from poor installs tends to announce itself slowly, which is exactly why this check sits before your payment, not after.
These are checks 11 to 20 on the master list further down. Run them twice: once on handover day, once after the first storm.
Inside the house: isolators, labels, consumer unit and battery
Start at the inverter. There should be a DC isolator next to it (or an integrated one, on many modern units) and an AC isolator within reach, both labelled, both operating smoothly without grinding. Then look for the warning labels. BS 7671 expects durable labels wherever an engineer could meet two sources of supply, at the inverter, meter and consumer unit, telling them to isolate both the mains and the solar before they start work. Missing labels aren’t pedantry. They’re what separates a safe isolation from a shocked electrician in five years’ time.
Open the consumer unit cover, or ask them to. There should be a new protective device of the correct rating for the generation circuit, the right RCD or RCBO type, and an updated circuit schedule. If the schedule still describes the house as it was before solar, the paperwork behind it is probably just as stale.
If you have a battery
Home batteries now have their own chapter in the wiring regulations (Chapter 57 of BS 7671 Amendment 4, published on 15 April 2026), working alongside the PAS 63100:2024 fire safety specification. Every new installation has had to comply since 15 October 2026, so a battery fitted today should pass these checks:
- Not in a loft, roof space or bedroom (or a cupboard opening into one), and not on a landing, stairs or any escape route.
- Indoors, only somewhere separated and ventilated, such as a fire-separated attached garage or utility room. Where it shares the habitable part of the house, the surrounding walls, ceiling and floor need 30 minutes’ fire resistance (REI 30).
- Outdoors, at least 1 metre from any door, window or vent, on an external wall or in a purpose-built enclosure.
- About 30 cm of clear space on every side of the battery and inverter, with nothing combustible pushed up against them.
- A smoke or multi-sensor alarm in the room, which is the one people forget in a garage.
None of this is retrospective, so an older battery in a loft isn’t automatically a problem, but it’s worth a conversation with your installer and your insurer. Ask for the commissioning sheet and the PAS 63100 statement of conformity, and confirm firmware was updated and alerts are switched on. If anything about the siting makes you uneasy, read my guide to solar battery fire safety before you sign anything off. It’s the one snag category where “they’ll move it next month” is not an acceptable answer.
And if your quote included extras, such as a diverter heating your immersion, an EV link or pigeon mesh, insist each one is demonstrated working, not merely fitted. A diverter that’s wired but never proved to heat water is a snag, not a bonus feature.
The monitoring handover trap nobody mentions
Here’s the one that catches even careful buyers: the monitoring account. If the system is registered under the installer’s email address, you don’t own your own generation data. You can’t reset a password you never set, and if that firm disappears, your portal can disappear with it. Sit down together and transfer admin ownership to your email before the final payment. While you’re in there, check the dongle or ethernet link is actually connected. Wi-Fi in a garage or loft is often hopeless, and “monitoring offline” is the most common silent fault in the book (here’s what to do when an inverter drops offline). If the signal is weak, ask for ethernet or a proper extender as part of the job. This rundown of monitoring apps shows what good looks like once you’re in charge, and if a fault code is showing on handover day, this guide to the common ones tells you how worried to be.
Then take five minutes for the demo: today’s generation, battery state of charge, export figure, and the shutdown routine. That’s the AC breaker and isolator first, then the DC isolator, until you can do it yourself without narration. Ask them to remind you that the roof cabling stays live in daylight even once everything’s off, and keep my shutdown guide handy for the full routine. An installer who rushes this is an installer who expects never to hear from you again. You want the opposite.
Proof it performs: your first fortnight of numbers
Every quote carries a modelled annual generation figure. Judging a December handover against a summer number is how perfectly good systems get wrongly condemned, so compare like with like. The rough shape of a UK year, worked out from a 4 kWp system in central England generating around 4,250 kWh a year, looks like this:
For a month-by-month yardstick, here are the same estimates broken down. The last column shows what an average day looks like per kWp, so you can scale it to your own system (a 6 kWp array gets six times the figure).
| Month | kWh (4 kWp) | Per kWp, per day | Month | kWh (4 kWp) | Per kWp, per day |
|---|---|---|---|---|---|
| Jan | 135 | ≈1.1 kWh | Jul | 550 | ≈4.4 kWh |
| Feb | 220 | ≈2.0 kWh | Aug | 490 | ≈4.0 kWh |
| Mar | 380 | ≈3.1 kWh | Sep | 365 | ≈3.0 kWh |
| Apr | 490 | ≈4.1 kWh | Oct | 255 | ≈2.1 kWh |
| May | 555 | ≈4.5 kWh | Nov | 145 | ≈1.2 kWh |
| Jun | 560 | ≈4.7 kWh | Dec | 105 | ≈0.8 kWh |
Ask the installer for the monthly profile behind their annual estimate, then run three quick tests in your first clear fortnight. One: add up the fortnight and compare it with half the modelled figure for that month, scaled to your system. Within 15 to 20 per cent either way is ordinary weather noise, not a fault, and a much bigger gap is a question for the installer rather than an accusation. Two: every string or microinverter node should be reporting. A dead string reads zero, or roughly half of its twin, and that’s a wiring or connector snag hiding in plain sight. Three: switch the kettle off at midday and watch the export reading creep up on the smart meter. If export never moves, chase it now. Export readings going missing is far easier to fix while the installer is still on site.
If the numbers stay low after a snag visit, stop negotiating and start diagnosing. This guide to underperforming systems walks through the usual suspects, from shading nobody admitted to configuration errors, and if a string reads zero, this 10-minute diagnostic comes first.
Get SEG-ready before you sign off
The Smart Export Guarantee needs a few things lined up: an MCS-certified install (or an equivalent recognised scheme such as Flexi-Orb), a smart meter that records your export every half hour, and an application to a licensed supplier, which sometimes means arranging a new export MPAN first. The application is your job, not the installer’s, but the certificate and a working export reading sit squarely on their side of the line, so both belong on your snag list. The government’s own SEG guidance spells out what suppliers will ask to see.
Worth knowing before you pick a tariff: the gap between the best and worst rates is serious money. Open-to-all fixed rates currently run from roughly 3p to 13p per kWh, tariffs tied to an import supply or a particular installer go as high as 25p, and time-of-use tariffs like Octopus Flux can touch 32p at peak if you have a battery. On a typical 2,000 kWh of exports a year, that’s the difference between about £60 and £500. Compare the current SEG rates before you commit (suppliers can change them on 30 days’ notice), or run your own numbers through my SEG income estimator. Check too whether the best tariff is tied to a specific installer, because that’s far easier to find out before the install than after. If payments go quiet later, this guide to SEG payments not arriving covers the usual causes.
The 48-point solar installation checklist
Tick as you go. Your ticks are saved in this browser, so you can come back to it with the kettle on between visits, or print it and take it round with you. Anything you can’t tick becomes a line on the snag list in the next section.
Paperwork 1–10
Roof & mounting 11–20
Electrical & inside the house 21–30
Monitoring & handover 31–36
Performance proof 37–42
Close-out & money 43–48
Writing a snag list an installer actually actions
One page. A photo next to every item. Two columns: “before final payment” and “by agreed date”. Email it even if you’ve just talked it through on the phone, because an email has a timestamp and a phone call has your memory of it. Give reasonable deadlines, with a fortnight for non-urgent bits being fair, and ask for the list to be replied to in agreement. Silence plus a dated email is still evidence, and most decent firms will simply say yes and come back.
The split between the two columns is where people get it wrong. Here’s how I’d divide it:
| Hold the final payment over | Dated snag list instead |
|---|---|
| Missing MCS certificate or Electrical Installation Certificate | Cosmetic trunking, paint marks, scratch on render |
| Active leak, exposed cable, or unsafe battery siting | A replaced tile waiting on a colour match |
| Monitoring account still owned by the installer | A missed section of pigeon mesh needing a short return visit |
| Export not registering on the meter at all | App notifications not yet configured to your phone |
| Any fault code showing on handover day | Spare parts or labels promised but not yet delivered |
Be human about it. A crew who feel respected will move heaven to close a list; a crew who feel ambushed will close the list slowly and badly. The leverage works best when it’s visible, boring and written down.
When paying is right — and the escalation ladder
Pay when three things are true: the MCS certificate is in your inbox, the snag list is closed or dated and agreed in writing, and the invoice matches the signed quote with zero-rated VAT on it. On that last point, the zero rate on qualifying domestic solar, battery and diverter installs runs to 31 March 2027 under HMRC’s VAT Notice 708/6, and it reverts to 5% from 1 April 2027. An invoice charging 20% on the install itself is simply wrong, and it’s worth querying before you pay, not after. Unrelated work on the same job, such as a roof repair, can be charged separately at the standard rate, so ask for it itemised. If your commissioning date sits close to the deadline, ask the installer to confirm in writing which rate applies and why.
Once you’ve paid, or ideally before the install, tell your home insurer. Insurers can refuse a claim over an undeclared battery even when it had nothing to do with the cause, and forgetting is exactly the sort of small print that bites later. Here’s how solar usually affects cover. Then go and enjoy the free electricity. That’s the entire point of all this fuss.
If it goes wrong despite everything, this is the order I’d climb the ladder in:
- Written snag list to the installer, with 14 days to reply with a plan.
- The complaints route. MCS acknowledges complaints within five working days and resolves most within about eight weeks, and it can order remedial work (how MCS handles complaints). If your installer is still in a consumer code, RECC and HIES have their own dispute routes too.
- Your card provider, if you paid any of it by credit card. Section 75 can make the provider jointly liable for purchases between £100 and £30,000, even if the card only covered the deposit.
- The ombudsman or Trading Standards, if everything above stalls.
And if the sale itself looks bent, with savings claims that never existed, pressure signing or credit you didn’t ask for, that’s a different path altogether, and this mis-sold checklist will tell you where you stand.
FAQs
You can usually hold it back for genuine, specific problems: missing certificates, a leak, unsafe battery siting, a monitoring account you don’t own, or a fault code showing on handover day. For a tidy job the paperwork and fixes take a few days to a fortnight. Don’t hold the full balance over cosmetic niggles. Split your list into “fix before I pay” and “fix by this date”, put both in writing, and read the payment terms you signed first, because your contract and any consumer code set the formal rules.
Three things, in this order. Paperwork: the MCS certificate, electrical certificate with test schedules, DNO confirmation, warranties and handover pack. The install itself: panels, tiles and cabling on the roof, loft penetrations, isolators and labels, and the battery’s siting if you have one. Performance: a monitoring account in your own name, export showing on the meter at midday, and your first fortnight’s output within roughly 15 to 20 per cent of the modelled figure for that month. The 48-point checklist above covers every one of them.
Start with a dated, photographed snag list sent by email, with 14 days for a plan, so there is a paper trail. If that stalls, complain through MCS, which can order remedial work, or through the consumer code your installer belongs to, such as RECC or HIES. If you paid any of it by credit card, Section 75 can make the card provider jointly liable for purchases between £100 and £30,000. If the firm has folded, the insurance-backed guarantee, or MCS-approved financial protection, is what protects the workmanship.